Deploy Hello World on Testnet
NOTE: this section is currently under development. There's currently no DevPortal URL. When the link becomes available, we'll remove this notice when it's ready to be deployed
In this section of the tutorial, we'll use the dev portal to deploy the Hello World boilerplate to the TEA testnet. The goal is to see the Hello [developer's name] TApp in the browser after launching such a TApp from the TAppStore.
Prerequisites
Besides the prereqs stated earlier, this tutorial involves uploading to IPFS and will require installing the IPFS command line tool. For those running MacOS it's also available through Homebrew:
brew install ipfs
You'll also need some TEA funds in your wallet to use the Developer Portal. You can request funds by sending us a message in our Telegram group.
Clone the tutorial master branch
Run git clone https://github.com/tearust/tutorial-v1.git to clone code to local. Recall that there are two folders in the root of the tutorial-v1 code repo:
sample-actor (the back end lambda function).
sample-front-end (the front end code).
If you'd like to check in any of your modified code to your own git repo, please rename the project to avoid any conflicts.
Setup TApp
Login to the Devportal with Metamask: (link will be updated here when ready)
You can see your account balance after login.
Go to the TApps page in the Devportal. Here you'll create a new TApp and save the token_id:
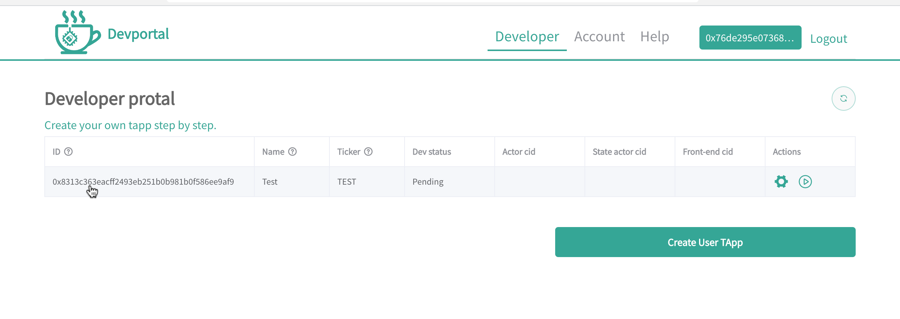
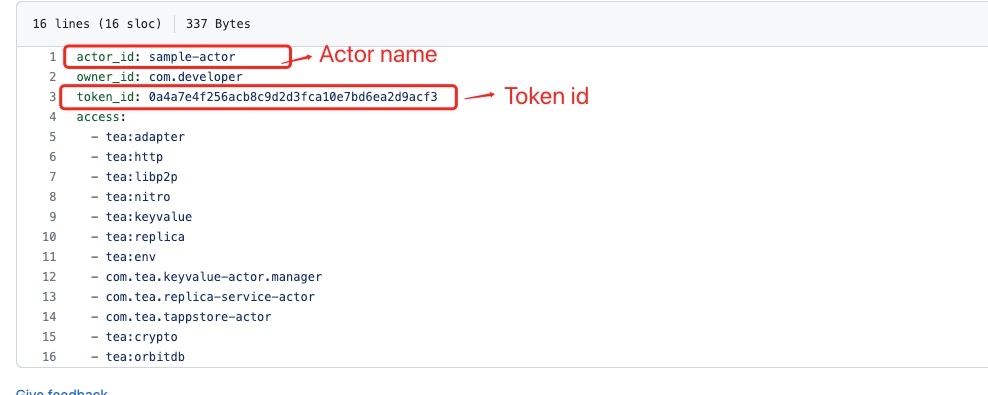
We will add this token_id minus the leading 0x to ~/sample-actor/impl/manifest.yaml at line 3. You should also change the actor name from sample-actor to a unique name.
Build and upload actor to IPFS
You can build your actor using the same commands we used in the previous step: cd sample-actor and run ./build.sh to build the actor.
To upload the actor to IPFS, run ./ipfs.sh from the same directory which executes the following script:
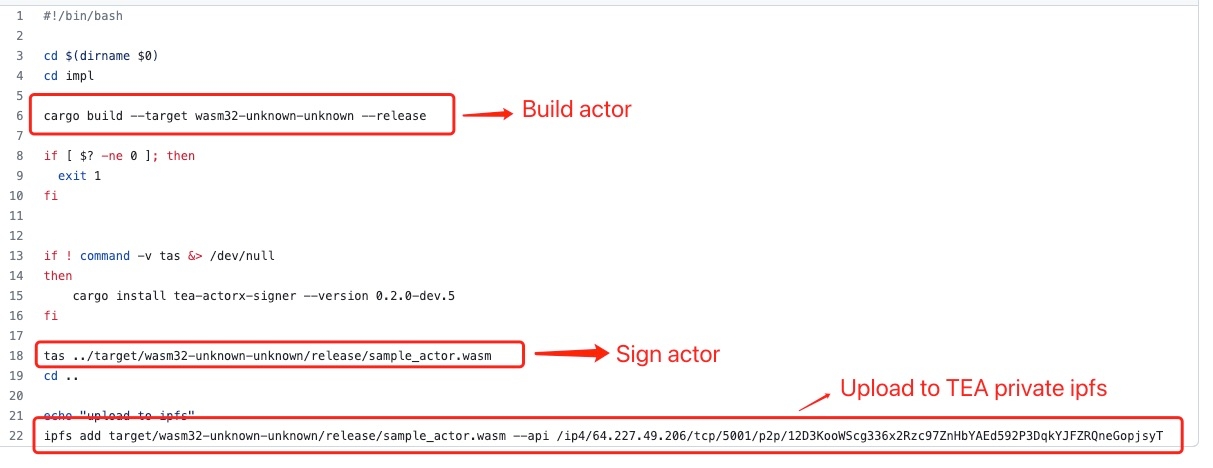
Save the CID returned from the script to use in the next step.

Update TApp metadata in the Devportal
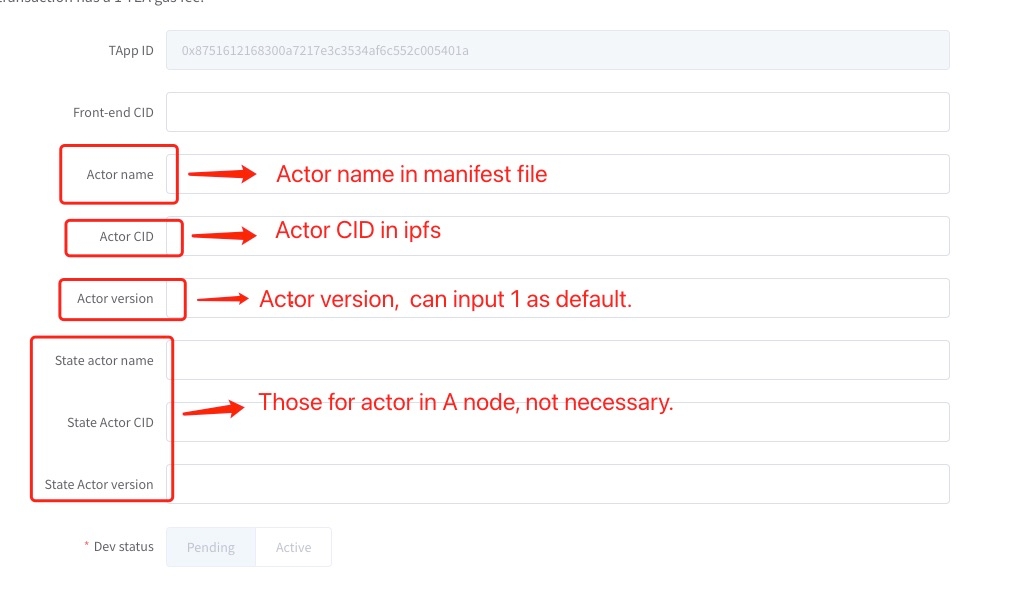
Go back to the Devportal and click the cog icon next to your TApp listing in the Developer tab.

Enter in the information as instructed in the following image to update your TApp's metadata:
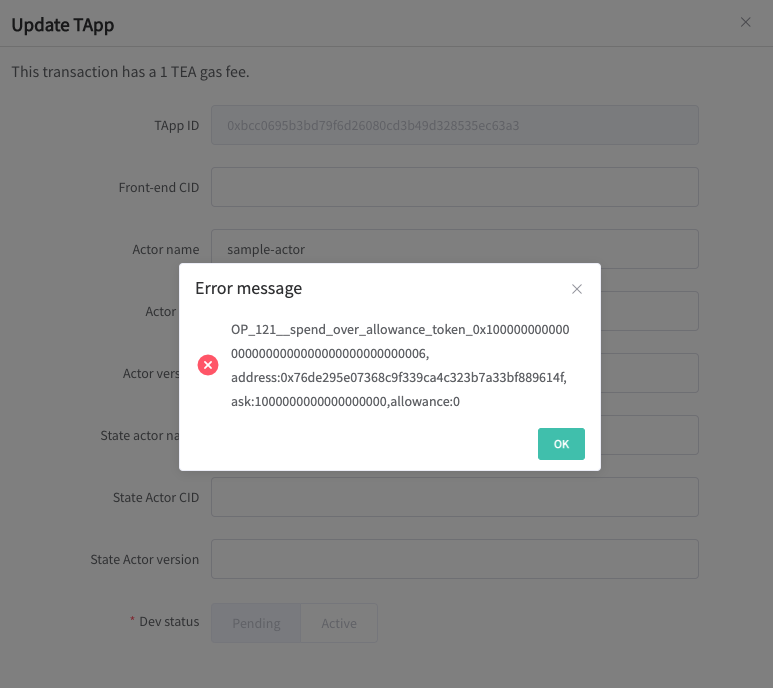
If you get a spend_over_allowance error:
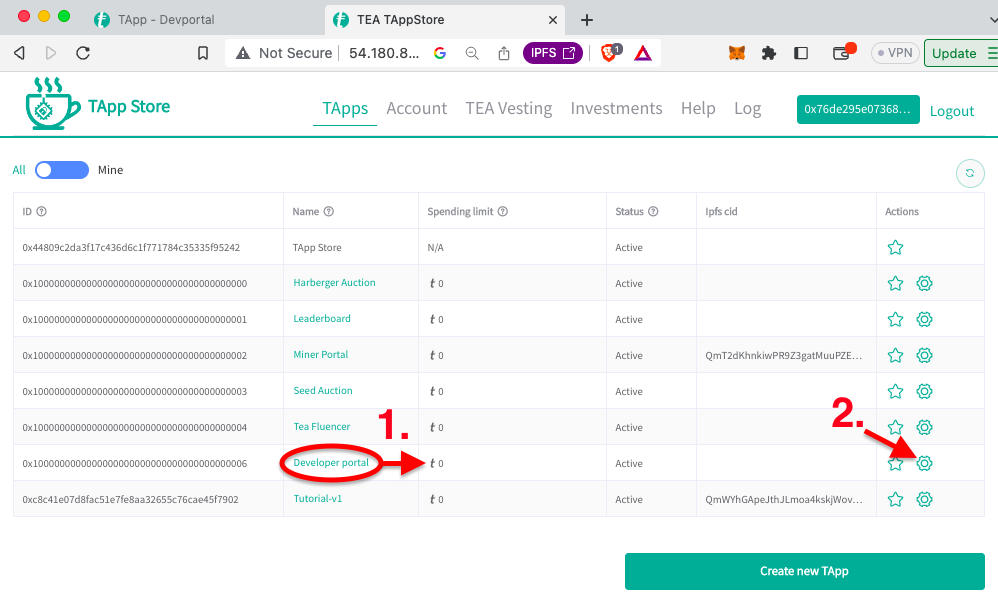
Then you'll need to increase the spending limit for the Developer Portal in the Nitro TAppStore:
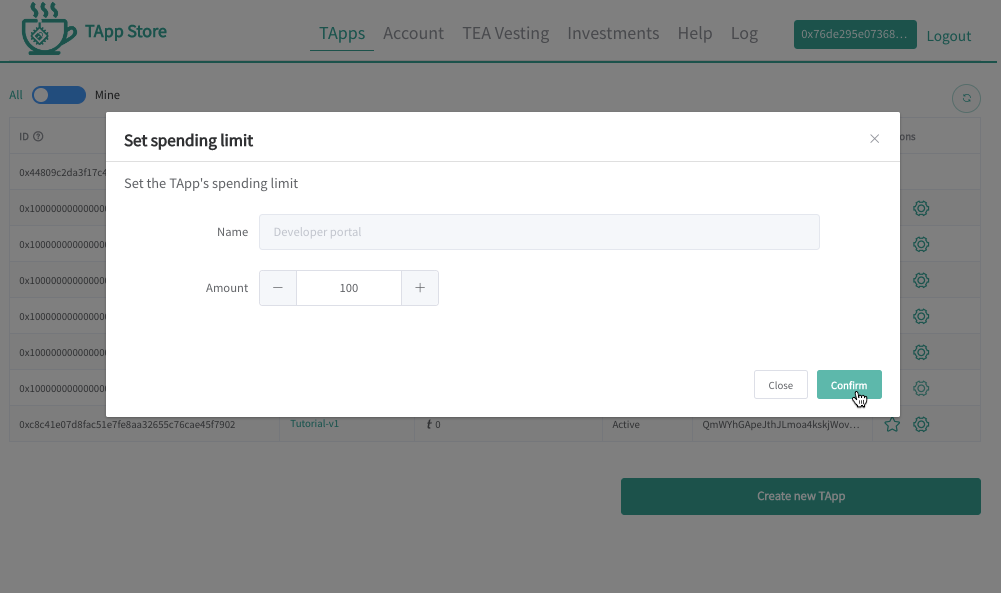
Here you can set the spending limit up to the amount you have in your TEA wallet:
Build and upload front-end
Build the front-end code (jacky_test/sample-front-end/) and upload to IPFS using ~/sample-front-end/ipfs.sh.
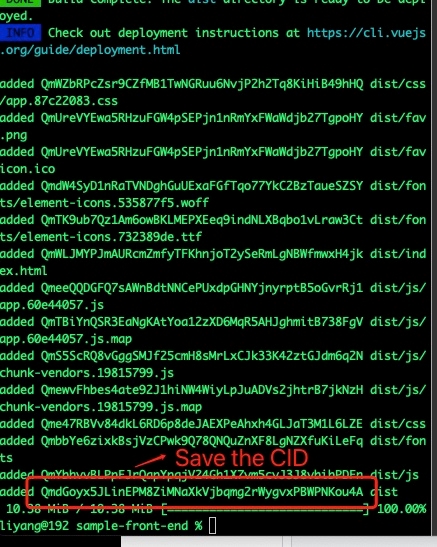
Upon succesful completion you'll save the CID of the front-end to use in the next section (the CID is on the last line ending with dist).
Update the front-end CID in Devportal
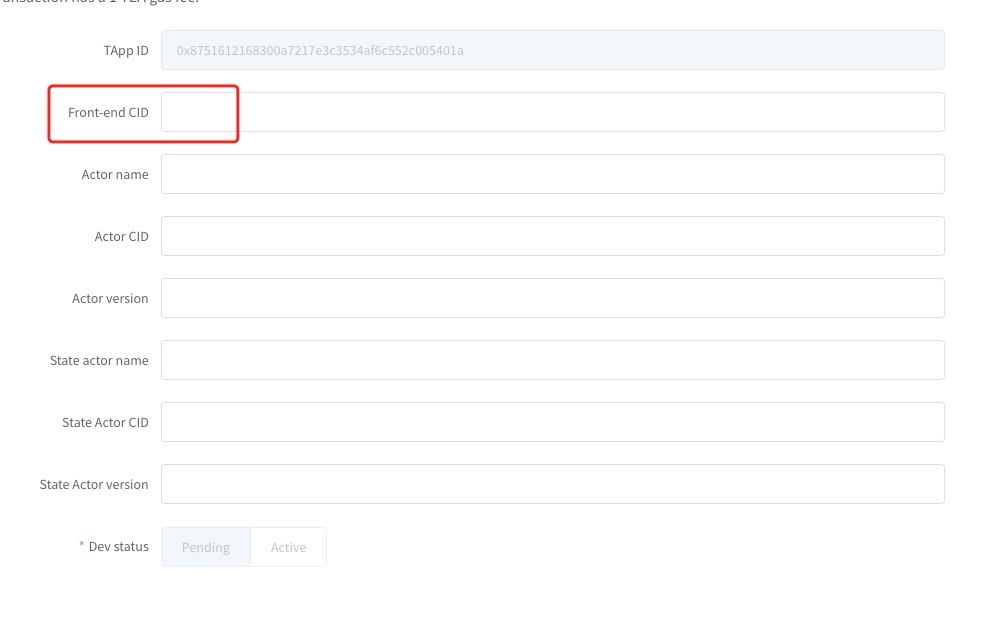
Edit your TApp and enter in the CID for the front-end:
Visit front-end code in ipfs using the URL format
http://54.180.82.194:8080/ipfs/[CID]/#/welcome
In our current example it would be http://54.180.82.194:8080/ipfs/QmdGoyx5JLinEPM8ZiMNaXkVjbqmg2rWygvxPBWPNKou4A/#/welcome
Note that the actor will be loaded after the first request. If you see an error "you need to try later", that means the node is loading the actor and will be available when you try later after it's been loaded.
Activate the TApp in the Devportal
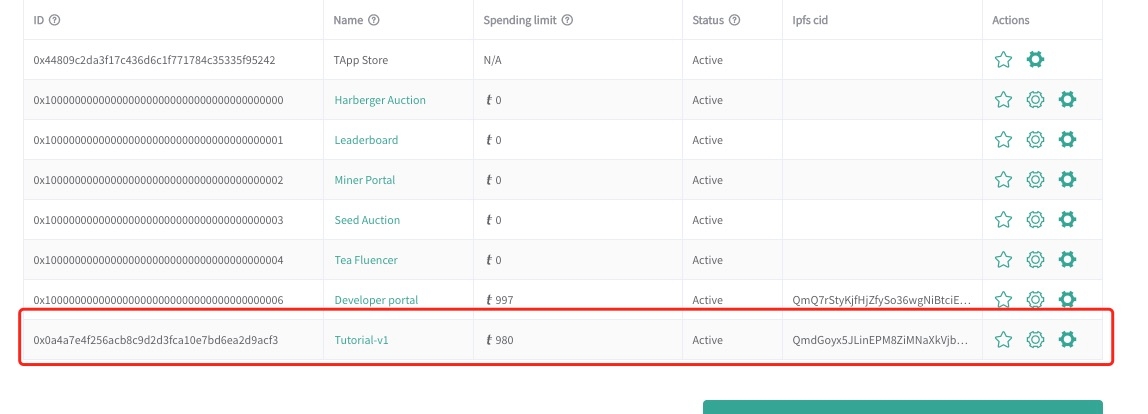
Activating the TApp will make it available on the TEA network. To activate your TApp, press the start button next to it in the Devportal:

Once it's active, other users can launch the TApp through the TAppstore.
Last updated